 How to clean your English Springer Spaniel's ears Regular ear check-ups and cleaning contributes to healthy ears, free of painful infections. Springer owners should practice ear health maintenance and clean their dog's ears twice a week. If you simply can't find five minutes to do this every few days, clean them at least once a week.
This is even more important in the summer-time, when the dog has been swimming or walking/running in tall grass, playing with other dogs, etc.. Many owners never check their dog ears unless the dog is shaking or scratching its ear(s). By that time there is usually an ear health problem requiring veterinary medical inspection. Common signs of ear problem are:
Ear infections "Otitis Externa" may arise from water trapped in the ear canal. The damp environment creates an ideal breeding ground for bacteria and fungus, often leading to painful sensitivity, redness, swelling and infection. Dogs with long ear flaps, such as Springers, are the most affected since the flaps cut air circulation and trap moisture. When you give your Springer a bath you should place cotton balls in their ears to prevent water from entering the ear canal. The ear must be completely dry so as not to provide a damp environment favoured by bacteria and fungus. Accumulations of wax and a lack of air circulation can lead to ear canker. Canker infection often causes a dark-coloured discharge and foul odour. The pet requires veterinary inspection of the condition. Some dogs scratch their ears as a result of allergies; they should be inspected and treated by veterinarians. If you see evidence of ear mites, you should take you dog to your vet for inspection to get a determination of whether there the dog is infested, and for treatment. Mites are very contagious and require special treatment over a period of weeks. There is a new veterinary product that can treat a mite infection in one day! Contact your Vet. It is also possible to discover weeds and other organic matter in ears. In fact, some weeds can work their way down into the ear canal and cause serious, even life-threatening conditions. On the West Coast of the U.S., the infamous "foxtail" weed finds its way into the ears of thousands of dogs every year, even cutting into the fleshy skin between feet pads and posing a serious health threat You will need the following tools and supplies for the ear cleaning procedure. Carefully read and follow instructions supplied with all products before using them.
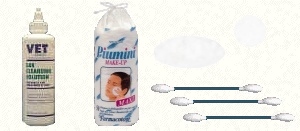 Vet Solutions Ear Cleansing solution is a good brand to use. It's mild, smells good, and has aloe vera to soothe.
Water and excess ear cleaning solution must never be left in pet ears. Do not use water in the cleaning process. Do not syringe your dog's ears; it is a veterinary procedure only. If you are uncertain how to proceed, don't. Seek professional veterinary care.
Remember, you should practice preventative ear health maintenance and check your dog's ears at least once a week. With serious ear infections, daily cleanings (or twice daily), dryings, and proper medications supplied by your veterinarian are necessary. |